Wednesday, July 26, 2006

She Knits

I have to take a minute to tell you about my lovely, talented friend Amy. She is getting ready to make her big debut this Saturday at the Richmond Farm Market. And man, can she make some cool things. She's the kind of person who sees something neato, gets an idea to make something else, and not only does it, but it is way cooler than the original.

In Amy's words, here's what's in store for Saturday:

I'm in! I'll be selling my handknits (with some crochet mixed in) at 17th Street Farmers Market this Saturday, July 29th from 9am-3pm. For those who haven't seen the stash, there are lined purses for women and girls, D-ring belts backed with grosgrain ribbon, baskets, and baby sweaters and hats. In the fall I hope also to have more items for winter. The purses are the latest addition and are crocheted out of hemp and lined with cotton with twisted handles. They are soft yet stiff enough to stand alone and with the bright lining, you can actually see the items inside! A great self-treat or Christmas gift.

The baskets and belts are my personal favorite, but the handknits are so sweet, and I really like the purses, and - well - it's all good! Really!

I was the lucky recipient of this basket in an impromtu craft swap:


She's so with it that she even has her own "branding" ideas. Now that's impressive.


Go see Amy Saturday and tell her I said "Hey!".

Thursday, July 20, 2006

Crayon Cookies

It's been hot enough to melt a crayon around here. And the only thing worse that the heat are the whiners who complain all the time about it (like me!).

In weather like this, I like to find indoor projects for the kids and I to tackle. While sorting through our homeschool books, I rediscovered
Scribble Art and its recipe for Crayon Cookies. Seeing as we had a gallon Ziploc full of crayon bits, I knew this would be a winner.

We started by peeling the paper wrappers off of all the crayon bits we scrounged up. My lovely littlest offspring used to do this all the time as a toddler, driving every one else using the crayon bin crazy, so she was a natural to be first up as a Crayon Cookie designer. The peeling was by far the hardest part. Apparently if the paper wrapper was still on, it had somehow fused to the crayon and was impossible to remove. I swear I sprained both thumbnails, and anything that might interfere with knitting is strongly frowned upon, so we moved on.

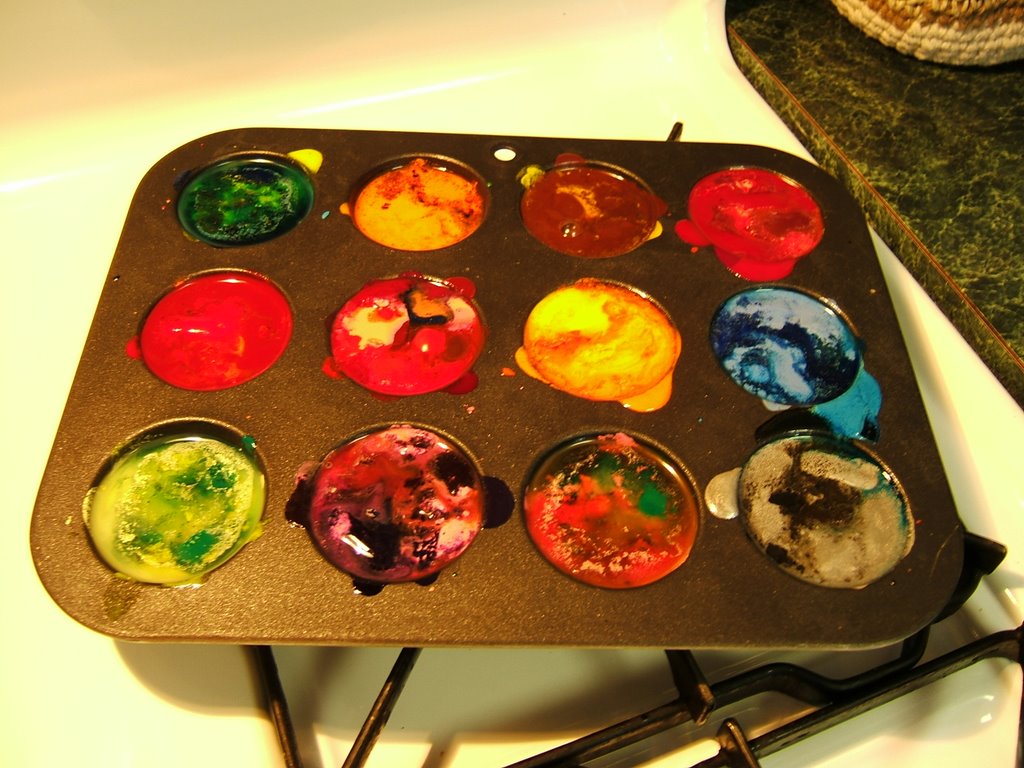
We used mini-muffin tins and filled them with snapped off bits of crayons of 2-3 colors per tin to make a more coherent Cookie (The photos are a bit blurry as I didn't know how to use the close-up function yet when I took these!). See if you can find the (University of Virginia) Wahoo Cookie, the Preppy Cookie, and the Pretty Pony Cookie.


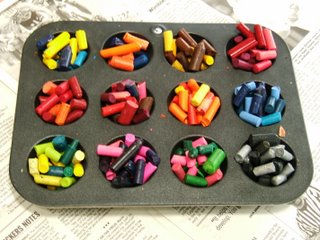
We pre-heated an oven (gasp!) to 300 degrees F., turned it off and popped in our tray. (We should have just topped with aluminum foil and sat it on our front steps). Things got goopy very slowly, so I relit the fire for a few minutes. And then things got very liquid.


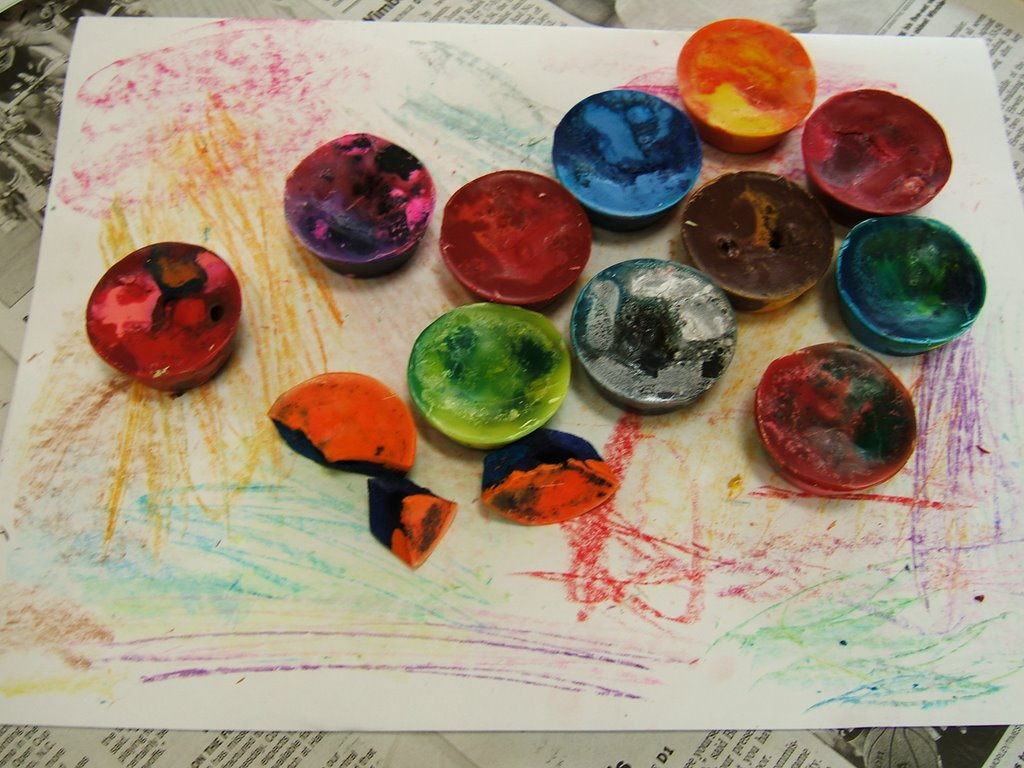
The cookies solidified in their pans on the counter (so as not to have liquid crayons running down the sides on my freezer!) and then I popped them in the freezer (Ahhhh!) for about a half hour. They just about jumped out of their little muffin cups and the true artistry could be seen.

Look at them from the side!


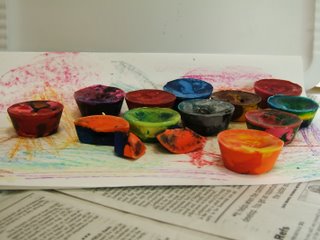
We scribbled them to make sure they worked, and then packaged them up for gifts for friends. We made another batch the next day and they came out even better. Here are a few tips if you want to try this yourself:
  • Use only one brand/kind of crayon. The batch we made of only regular Crayolas melted more evenly. When you throw in the washable ones (very hard to melt) and all the freebies from dining establishments, differential melting becomes a problem as some melt to water-like consistency while other are rock hard. Also, some are more brittle (the washable ones?) and didn't make very strong Cookies for the over-active scribbler.
  • Don't refire the oven if you are too impatient. Just wait and get over it. It'll be a character-modeling lesson for the kids. Right, the kids.
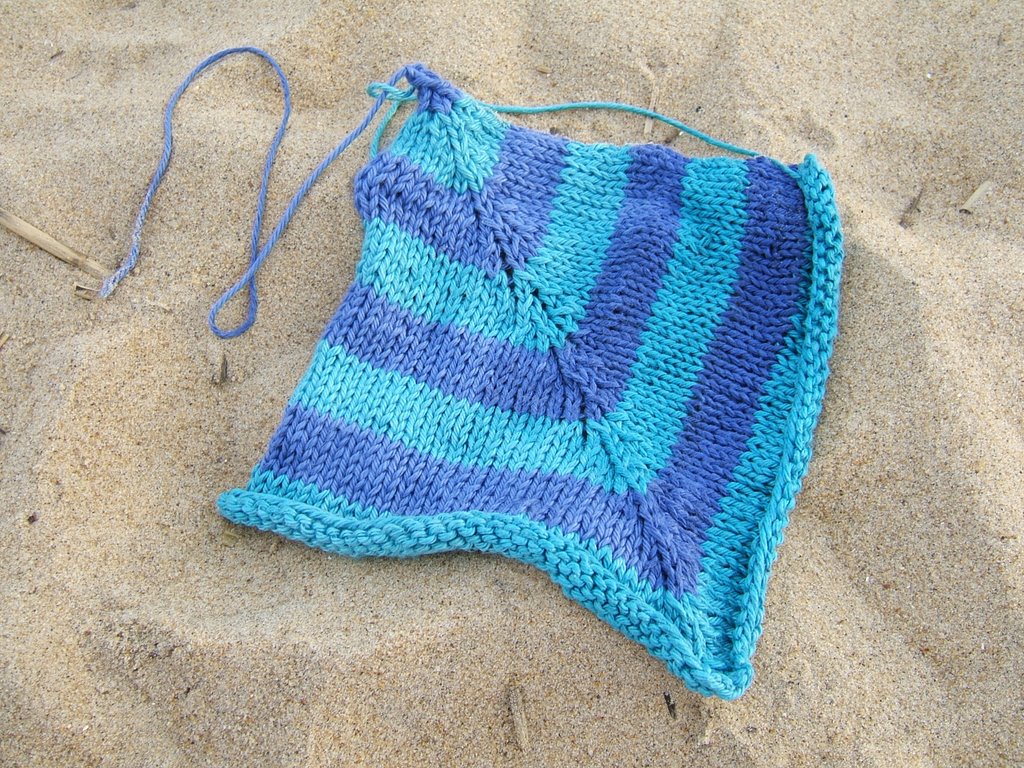
  • 2-3 highly contrasting colors gave the best scribble. The all-shades-of-blue Cookie looked great, but was a little underwhelming when it came to performance testing.
  • 3 full crayons are about all that you'll want in a mini-muffin tin. It looks like it will hold more, but you don't want them coming over the edge and spilling in your oven. Use a pan underneath while the Cookies are in the oven.
  • Last hint: Hit the back-to-school sales now for supplies for Christmas crafts.
If you try this yourself, please share any pictures of Cookies you make - I'd love to see them!


Pretty Produce

The first non-bird-pecked, non-blossom-end-rotted, red, ripe tomatoes have arrived in our garden!


It has been so dreadfully hot that I certainly have done nothing noteworthy, but oh, how the garden is trying to rally. The heat (and random watering) has about done in the pepper plants, but the cucumbers are holding in there. The mysterious vines are actually holding up the tomato plants and I can no longer distinguish between the watermelon, birdhouse gourds, and the other one whose seed was planted and quickly forgotten. There are even a few sunflowers poking up above the chaos. What a jungle we've created out there. And in containers even.


Who would have thought things could get so crazy in the world of container gardening?

Tuesday, July 11, 2006

Happy 7-11!!


How could I have almost missed my favorite holiday?!!
Yes, there really is a Seven-11 Day! And here is Party Central:


Need to celebrate with a few cold ones? Find you local paradise
here.


This size is free - and worth every penny. They even have celebratory cups! We highly recommend the sour watermelon and the Purple S'creme. What could be more summer than a crew cut and a Slurpee.


Happy Brain Freeze to you!


Anatomy of a Disaster

You always hear that you should learn something from your mistakes. I'm usually in too big of a snit to bother. I just work out all my frustrations in disposing of the offending project. But this project was rather different. I did learn something, and I thought you might want to witness the carnage.

I've been working on a t-shirt rug since my friend Amy told me about Erica Knight's crochet book Simple Crochet. Amy made a BEAUTIFUL rag rug in about 12 minutes, so I assumed that I could crank one out made of t-shirts in about 12 weeks, working 24 hours a day. The fact that I didn't know how to crochet very well didn't much figure into my calculations. Besides being WAY over schedule (I started this last fall!), other lessons I have learned from this project:


1. Cut your t-shirts outside. They make a mess of tiny speckles of fabric. With white shirts, mine looked like snow. Same holds true when you're doing the hooking - much rug dandruff ensued.

2. Cut all the shirt strips close to the same width. I started a little skinnier than I should and tried to just keep going. Mistake. Ideal for me would have been 1 1/2" width strips.

3. If you don't cut your strips the same, take out what you've already hooked. If not, you get this (prewashed rug):


4. No amount of blocking will fix a wonky rug if you don't follow the above advice. Post washing rug with bonus toes:


5. Rugs need to be much tighter than I can hook. I wound up with big holes and a rather macrame look to the rug. Maybe the M hook was too big. Close up the meshness of it all:


6. Bad looking rugs can still feel good on your feet. Cotton t-shirts were a good choice.

7. No matter how good your rug feels, it won't feel good mashed into the corner of your bathroom because the door doesn't have clearance to swing over it.

8. Not tying new ends together means that they'll come out in the wash. If they're really loose, you can tie them after the laundry like this:


9. No mat should be used in a bathroom if it can't be washed and dried.

10. No amount of time and effort will make a project salvageable if it just didn't work out. So goodbye, little rug friend! Have fun in the landfill.

And now that I feel like a better person for learning and passing on my tips, can someone please explain this train wreck:


I finally screwed up my courage to print some clothing labels on my computer using cotton twill tape and painter's tape. Did two test runs: check. The second test was even run with the tape and all applied, but the paper backward to check for placement (NOT because I forgot to turn the paper the right way. Really). And then this is what printed - nowhere near the target. Arg. And the print seems a bit bleedy. Maybe because the "cotton" twill tape I could find was polyester?
It is all very irritating and not a bit instructive. Apologies to Amy, but looks like I am not making any labels for you.

More on the "She Knits" logo in a future, happier post.


Sunday, July 09, 2006

Pillowcase Dress

LOVED the post on Rosestichery about making a pillowcase dress. I've had a pillowcase in mind to use for a dress, but other methods seemed to make the body too big when my now 5 year old daughter was younger. She's growing so quickly, though, that I knew that I couldn't put this off forever.

Here's the stitching on the pillowcase that I fell in love with (check out the pretty hemstitching):


I started by measuring my daughter's shoulder to desired length. It turned out to be 30", about 1/4" short of the length of the pillowcase, so I snipped of the seamed end.


I then cut the armhole using the 4" depth recommended. If I do this again, I would cut a 5" depth for my little person and make the "J" shape lean in a little more to make the armholes fit a little looser.


I turned down the top edge, using my grandmother's metal ruler. It is just a stock Dritz from a fabric store, but she etched her initials in the back ("JM" for Josephine Manthey). She was a champion sewer and crafter and I think I got my interest in all things textile from her. It makes me happy to think that she's watching her things be enjoyed.


Next, the top cut edge was folded down to create a casing for the elastic.


The elastic was threaded through and I remembered to sew the opposite edge down before I pulled it all the way through!


The seam binding was applied to the arm holes, with the extra length creating ties on top. I cut a 30" (instead of the recommended 23") length of binding to make sure I had bigger ties for a bigger girl. Sewing down the binding was a breeze with the tip about sewing with the narrow side up, to insure catching both edges in the seam.


I added a little label for my sweetie and all was done!

Here she is sporting her dress by the purple cone flowers in our garden. I think the dress came out a bit longer than I planned, but she loves it.


Now she's all ready to go to a birthday party this afternoon!

Will They or Won't They?

I love canning. Didn't particularly like it when I was growing up and could have helped my parents, but when a former co-worker started showing up with 5-gallon buckets of produce, I knew what to do!

I started naming whatever I was canning for whatever might be happening at the same time. Thus, my husband's favorite bread and butter pickles became "P.E. Pickles" because I was canning them on the day he got his letter informing his that he had passed his Professional Engineer's exam. I think I made "Prego Pickles", also, because I remember canning 48 pints of pickles in one day while pregnant with my son. Unfortunately, this charming habit means that I don't know what the original recipe was called and thus where to find it, so named canning accomplishments are rarely repeated.

Fruit is a favorite to can. Jams, jellies, and even fruit pie fillings are great to eat and to give to others. But my preserves attempts always have an undercurrent of tension running through the kitchen: "Will they or won't they set up?".

I think I've cleared the naming and setting obstacles with my Firecracker Jelly recipe. It was named for the 4th of July weekend when it was originally made and with a nod toward the heat is can generate. It seems to set up every time (yea for liquid Certo) and, even better, I know where the recipe is!


I fired up a batch last night. Here are the jalapenos giving their goodness for the cause:


After adding green peppers, vinegar, and sugar; they made a great, green, gloopy stew. I finished up with processing the batch and went straight to bed. So when I got up this morning with one question on my mind, I found my perfectly set up jellies waiting for me.


They did!

Tuesday, July 04, 2006

Happy 4th of July!

I was trying to find red, white, and blue in the garden, but we have no red (unripe tomatoes don't count, do they?). I did find these great hydrangeas. The blue is SO vivid, wish it showed up better. And the white ones are just getting started. Can't wait for the big containers of flowers for the house.


As promised, here is my festive miter. I bound off this patriotic one this morning to celebrate the big day (looks nice with the hydrangea, don't you think?).


Happy 4th to you all!

Monday, July 03, 2006

River Knitting

We escaped to the River yesterday. So relaxing!

I can't think of many things I would rather do than knit a small project while lying in a shady hammock being cooled by a glorious breeze blowing off the water. Heavenly! Here is the end of the 5-Hour Baby Sweater 2.0:


Oh, shoot, the family is returning by canoe.


Maybe letting them play with the hose will let me finish off these last rows.


It worked! A little bit of finishing and I'll have a report on the 5-Hour 2.0.

Pretty In Pink

I picked up a pretty pink dress at an end-o-season sale last year for my daughter, in case we had any formal events this summer. No weddings and no graduations are on our radar, so something had to be done. Since I couldn't pep up my social life, I decided to shorten the skirt so that my daughter could actually wear this out in public, without needing attendants. I didn't want to mess up the pretty applique on the front (or make a hem with this slippery fabric), so I lopped off 6 1/2 inches of the waist. I reattached the lining and replaced the waist elastic.


I was looking at the top chunk of skirt that was looking back at me and I remembered the recent Whip Up post I had just read. And voila! I made a matching purse. I used the top hem from the waist and added a few darts, seamed the cut bottom, and added ribon, flowers, and a button. Wish there was enough left for a mommy version!


My daughter is so tickled be able to wear her dress and loves the matching purse, and that makes the whole endeavor so much more fun. She immediately filled it with "married buttons" (I'm not asking) and claimed that she was NOT going to let her friends see it. Oh, to be 5 again!

Sunday, July 02, 2006

Re-Entry

We're back home briefly - and had a great time at the beach. At my kids' ages, it is hard to not have a blast at the beach. They were in the ocean or the pool the entire time we were at Virginia Beach, a fact that amazed me even as I kept one eye on them.


The other eye was on my knittin'! This is my favorite picture - the colors match the ocean - and the tiki bar at the pool. Great Shirley Temples! Ah, pool knitting!

Knitting cotton on the beach is (as my friend Pam would say) fabulous! A little water, a little sand - no worries. And it felt so cool and light. Perfect summer knitting! Here is the first square again after it got dipped in the Atlantic Ocean. As my nephew-to-be is in California, I thought this would be kind of a fun blankie fact.


Here's how much yarn I had left after my fourth square using this color. That's a shortie needle (8"?). Now that's close!


I'm holding off on pictures of the squares I've completed until I finish them ALL. [If you want to see picture after picture after picture of sqaures, check out the
KAL.] I will let you know I am on my 5th square and you'll get see another one to celebrate an upcoming holiday. Oh, the suspense!

We topped off our visit with a run to the Purple Cow. Insert requisite tongue picture here!